by Texas Homesteader ~
I bake LOTS of homemade bread whether in the oven or using a bread maker.
But I’ve incorporated many bread-making shortcuts so I’m not starting over every day. This speeds along my bread baking day with less effort. Come see my shortcut tips!
Repeating Chores Of Making Homemade Bread
OK, so if you follow me on Facebook, y’all know we’re doing a grocery no-spend challenge this month. Which means I’m baking LOTS of homemade bread.
But I’m trying to find shortcuts so that I’m not starting over every time. I needed some real time savers.
Although baking bread is easy it seems between pulling out ingredients & bowls, measuring cups & spoons I’m spending way too much time in preparation.
And too much time with cleanup too.
How To Properly Measure Flour For Homemade Bread
We love bread and I have lots of favorite bread recipes:
…and MANY more! You can see all my favorite bread recipes Here:
But you see, when measuring flour to make homemade bread, you can’t just scoop the flour into the cup & level it off.
To measure this way compacts the flour. It’s almost certain to result in too much flour measured, resulting in a heavy dense loaf.
To measure flour properly for bread baking you need to spoon the flour into the measuring cup, then scrape the excess away with the flat edge of a butter knife.
But uuug, measuring this way can be messy and it takes more time. Especially if you have to do it often.
Weigh Flour Instead Of Using Measuring Cups
To simplify, I’ve measured and weighed the various amounts of flours I use in my bread. Then I made notes on my recipe card of the weights to go with the cup measurements.
This is one of my most beneficial shortcuts. Weighing the flour instead of using a measuring cup is much faster!
Now when I’m measuring flour for my homemade bread I just place my empty container on my digital kitchen scale and tare the weight back down to zero. Then I dump in the flour in until it weighs what I’ve noted on my recipe.
I’ve heard that the weight of your flour could vary based on type, and even the humidity in your area.
Although this is probably only an estimate, here’s a link from King Arthur Flour that gives estimated weights of a cup of flour.
Make Pre-Measured Ingredient Packets
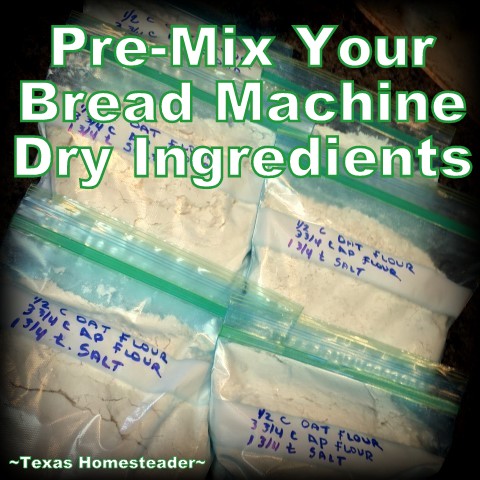
This is my favorite of bread-making shortcuts. Since measuring the flour is so much quicker, why not make up several packets of your dry bread ingredients? It’s like your own convenience mix.
I use a bread machine during the hot summer months so I can place the bread maker outside on our covered patio. That keeps the baking heat outside instead of inside the house.
But whether using a bread machine or making bread the old fashioned way, using pre-measured dry ingredients is a shortcut that significantly shortens my bread-baking tasks.
I just weigh out my various flours, salt, etc needed in my bread recipe and make several pre-measured packets at one time.
Canning Jar Update: I wanted to use repurposed and nearly infinitely reusable canning jars to hold my bread-making dry ingredients. But even the quart jars were just not big enough to hold it all.
But then I found that by using wide-mouth quarts instead of regular mouth quarts, I got just enough extra room to be able to fit everything into a jar. Perfect!
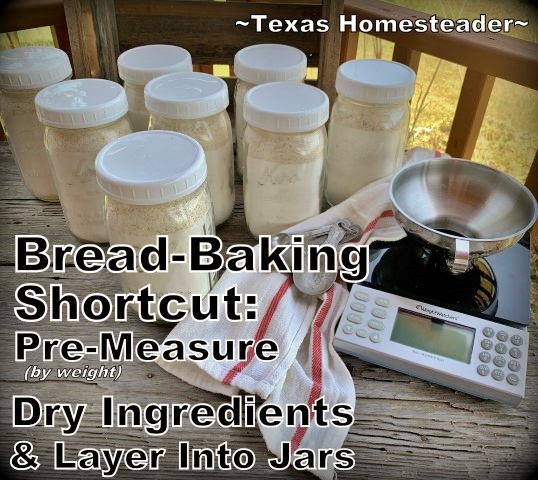
It’s my own super-cheap convenience item!
Utensil List
If I’m baking my homemade bread in the oven instead of a bread machine, I have a list printed and placed along with my bread-baking ingredients.
This list contains specific utensils, which measuring spoons I’ll need, my rolling pin, bread pans etc. that I’ll need to bake the bread.
By consulting this list & bringing out each item I’ll be using, I have everything I’ll need at my fingertips before I even start!
I’ve found this streamlines the whole task since I don’t have to stop in the middle of my recipe & dig out a measuring spoon or rubber spatula.
Cook Multiple Loaves of Bread At One Time!
My bread recipe makes two loaves, but my oven will comfortably fit 3 bread pans. Why not go ahead & fill up that oven?
Instead of only baking 2 loaves, I should fill up the oven & bake 3!
So I calculated 1.5 times my bread recipe to turn it from 2 loaves to 3. I was sure to document the correct measurements for 3 loaves in my recipe, and now it’s the quantity I’m always baking.
Three loaves for the work of 2? Yes please! I place the other loaves in the freezer so they’ll be ready for RancherMan when he needs them.
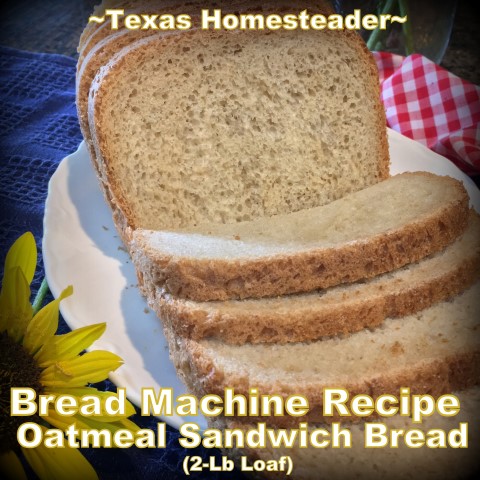
Update: Most days I’m making full use of a gifted bread machine to make a 2-Lb Loaf Of Honey/Oat Sandwich Bread. Everything is now EVEN EASIER!
Clean Up Along The Way
When I start making bread, I first fill a tub with hot soapy water. I fill another tub with clean rinse water. Then I place the draining rack in the other side of the sink.
As I complete each task I drop the preparation utensil into the soapy water to soak. Then while my KitchenAid is mixing or the bread is rising, I’ll wash and rinse those prep dishes and drop them in the draining rack.
Since dishes are washed up along the way nothing gets dried-on hard, which would make cleaning up even more unpleasant.
And since there are lots of idle times when making homemade bread such as when the bread is rising, I can use those minutes to wash or put away that round of utensils.
That way there’s no drudgery of washing up and putting away a sink full of dishes after the bread-baking is done.
Use those work-saving shortcuts, y’all. Work smarter, not harder is what I always say…
~TxH~
Other Favorite Breads
- Soft Sandwich Bread
- Oatmeal Sandwich Bread
- Making Pre-Mix Bread Ingredient Packets
- Bread Machine Recipe: Honey Oatmeal Bread
- Making My Own Oat Flour For CHEAP
- No-Knead Rosemary Skillet Bread
- No-Knead Boule Bread
- Jalapeno/cheese Yeast Bread
- Easiest Honey/Oat Hamburger Buns
- Jalapeno/Cheese/Beer Hamburger Buns
- Basic Beer Bread
- Rosemary/Cheddar Beer Bread
- Pesto Beer Bread
- Homemade Country-Style Buttermilk Biscuits
- Mix-n-Bake Cheddar Biscuits
- Leftover Biscuit Dough Cinnamon Rolls!
- Snappy Jalapeno/Cheese Biscuits
- Jalapeno Cornbread
- Corn Dodgers – A Delicious Accident
- Mix-n-Pour Tortillas
- Easy Corn Tortillas
- Sweet Pumpkin Bread
- Cantaloupe Bread w/Pecan Praline Glaze
- My Favorite Bread-Making Kitchen Feature
- Homemade Bread-Making Shortcuts, Tips & Tricks
- Make Self-Rising Flour From All-Purpose Flour
- Our Favorite Bread Recipes, All In One Post
All Bread Posts
C’mon by & sit a spell! Come hang out at our Facebook Page . It’s like sitting in a front porch rocker with a glass of cold iced tea. There are lots of good folks sharing! And you can also follow along on Pinterest, Instagram & Twitter
If you’d like to receive an email when a new blog post goes live,
subscribe to our Blog!

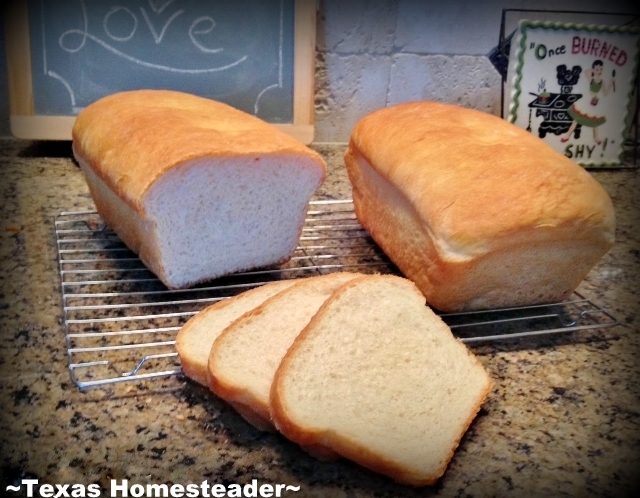


I enjoy making homemade bread but the problem is getting the family to eat it.
I. Can’t. Even… I can’t wrap my brain around that. I can’t pull RancherMan off of this bread long enough for him to just barrel through it resulting in the need for me to bake more & more & MORE! Try my KitchenAid bread, it’s delightfully fluffy and delicious. https://texashomesteader.com/finally-a-soft-delicious-sandwich-bread/ ~TxH~
Tammy,
I DID IT~ I’M DOING MY HAPPY DANCE!! I baked my first bread with your recipe and help. It came out perfect for Jess. Like your RancherMan, Jess is lost without his bread. As you know, I was really intimidated to even try to bake bread but with your easy-to-follow recipe and your added personal note and tips to me, it wasn’t difficult at all. The one thing I did wrong though — I left the bread in the oven while waiting for the 400 degrees. They came out a little hard, but not too hard. Jess has just about finished both loaves, so I’ll be baking bread tomorrow (raining all day).
I can’t THANK YOU enough for the encouragement. I hope others who are “first-time” bread makers will find the courage to try your Sandwich Bread recipe. Jess wanted me to make sure you know how much HE loves this bread and APPRECIATES you teaching me how to bake it.
We deeply and completely appreciate you sharing your knowledge and time and even making the extra effort to encourage a “newbie” to making homemade bread.
P.S. Jess said the crust got softer each day — he had no complaints at all! LOVES IT!!!
Bobbie
OMGosh Bobbie, that’s SO COOL! I know RancherMan loves my bread, and now I’m changing it up occasionally by whirring up whole oats in my electric coffee grinder and using some of it to replace some of the whole wheat flour – I’m loving that recipe too! The crusty crust is something I fight against as well, like you I like a softer crust. So when there’s 5 minutes of baking time remaining I pull the loaves out of the oven, rub butter over the crusts and return the loaves to the oven for the last 5 minutes to let that butter bake in. And when the loaves first come out of the oven I allow them to cool in their pans (covered with a kitchen towel) for about 5 minutes first, this retains some of the steam without making the bread soggy. Then after 5 minutes I remove the loaves from the pans to completely cool on a wire rack but again the loaves are covered with a kitchen towel. This pretty much gives me the softer crust I’m after. But I’m SO HAPPY you’ve gotten the hang of bread!! It only gets easier with practice, so YOU. GO. GIRL!! ~TxH~
Great tips! Bread is one of my biggest weaknesses and I could probably live forever on bread, cheese and wine! Thanks so much for sharing with us at Share The Wealth Sunday! xoxo
Those are some beautiful loaves of bread! I’d like to get back to making homemade bread occasionally. Saving for later! Thanks.
AHHH..fresh bread. Something I plan to work on doing more of! Your post is put together very well and I appreciate the details you gave. Being able to pre-make and stick in fridge is a good thing too!
I used to make fresh bread often, but I haven’t done it in a long time! Always love to simplify cooking tasks.
Great idea, Tammy. I’ve been thinking about doing premixed batches of the dry ingredients for things, too, like pizza dough, sliced bread/rolls, and maybe even pita bread (though one batch of that will last long for us, plus I can freeze those, no problem). Are you using AP flour, or freshly ground flour?
I just use a combination of AP and WW flour when I’m making bread Kristi. I like the more robust feel of the WW but to me it’s dry using 100% whole wheat. I’ll usually settle on a mixture of 1/3 WW and 2/3 AP. To our tastes it’s the best of both worlds. ~TxH~
Ah yes, I totally get that, Tammy. I was just curious because I’m trying to move away from AP flour and I was wondering what the texture was like for your bread. I know that AP flour and WW flours combined yields a fantastic loaf of bread!
That could really save some time if you have to make a double batch. Thanks for sharing.
We do the no spend month challenge as well. This is great info! I have been wanting to try baking our bread as well. Thank you for posting 🙂
The bread is where I almost broke, I just couldn’t keep him supplied. We’ve made some adjustments & compromises and it looks like we *may* just make it! ~TxH~
Thanks so much for sharing this with us. Homemade bread is frugal and delicious, but it can be so time consuming. It’s taken years, but I’ve finally settled on our favorite recipe. I usually make 2 loaves a week of my standard recipe and then I make a batch of Artisan bread that I refrigerate. I use that for round loaves for soup, for pizza crusts, or for Naan. It’s fun to experiment and find shortcuts. Thanks for sharing yours. Blessings.
Supposedly, a “slow rise” (in the fridge) makes bread even better, with a stronger yeast flavor- that flavor that says “homemade!” Did you notice an even better flavor (if possible!!) with the slow rise loaves? Thank you for sharing this with us at Treasure Box Tuesday! 🙂
This is very interesting and informative as usual. I try various different bread recipes to find one that suits so thanks for this one and for sharing at Good Morning Mondays. Blessings
Thank you for sharing. It is always helpful to read different ways to bake bread.
Ok
I may have to give this a try. I confess I’ve only ” made” bread by hand once- Honey liked it. Typically, another confession, I make bread in the bread machine. He hasn’t cared much for the breads I produce with it. Currently it’s packed because of the move we’ve been discussing – my thoughts on this?
I should just bake some bread!
I love home made bread but haven’t made any in awhile. We seem to have cut back on our carbs. This looked so yummy I may have to bake another loaf.
I plan to make your recipe next. I have tried many and landed on one we like the best. I’m anxious to put our recipes together and see hoe they compare. I thought measuring a large quantity of ingredients at once would save time. We are new empty nesters so we don’t go through much bread anymore though. I love using a pain de mie pan.
I watch the GBBO and this is what they have suggested.
Watched the GBBO and this is what the judges suggested:
Proofing bread in the microwave.
Proofing bread dough refers to the time the dough is given to rest and rise before being baked. However, this can take hours. The microwave method claims to speed up the waiting process in three easy steps.
After the dough has risen for the required initial rise, cover it with a dry towel. Then cover the entire bowl with a very wet towel and put in the microwave for 25 seconds.
Rest for five minutes. Put back in the microwave for about 25 seconds again, then remove.
Let rest and rise for about 45 minutes.
My Note:
Never, ever double your yeast mixture. Adding more yeast to speed things up will lead to flavourless bread. The long rise and fermentation of bread allows it to be more elastic and supple.
You’re right Colleen, I’ve found making bread just takes time. Time to allow the yeast to rise. Time for it to bake to golden perfection. RancherMan is beside himself with joy that I’ve perfected (for the most part…) making this bread. I’m going to toy with tweaking my recipe to make 3 loaves instead of 2 though. My oven holds 3 loaf pans & I want to fill it up when each time I turn it on. I’ll be sure to share the results… ~TxH~